HTML is the backbone of today’s internet. Millions of websites together formed the internet. Where HTML is the building block of all these websites. Twenty years ago, even if you are just a hobby blogger, you had to know some web coding to protect yourself or to add a simple function to your site. But now there are so many editors and plugins available that even knowing the basics of HTML is no longer required.
The problem with this is that if you don’t know a few basics, you can easily get into real trouble in your blog and have to hire a pricey developer to fix what may be a minor problem. Not only that, but creating changes to your blog such as adding a custom text widget requires a little knowledge.
And if you are experiencing content layout doesn’t look right, HTML knowledge can get you back on track.
Making Your First Site? Try No-Code Website Builder
You don’t need coding skills to create a website with a builder like Wix. The tool comes with 800+ designer templates and allows you to manage your site from mobile > Try Wix for Free, Click Here
Also Read
Before You Start – The Basics of HTML
What is HTML?
HTML is the abbreviation of Hyper Text Markup Language. It is the standard language for tagging contents for web browsers.
HTML is represented by “Elements”. Elements are also known as “Tags”.
Why is HTML needed?
Web browsers can only render a website when it is written in their supported language. HTML is the most common markup language and has the highest acceptance to web browsers.
That’s why you need HTML.
Is HTML case sensitive?
HTML is not case sensitive. But the best practice is to write HTML with proper cases.
Beginners-Friendly Hosting to Host Your HTML Projects
If you are a beginner, we recommend hosting providers that are affordable and easy to start with. Instant account activation, an easy-to-use control panel, comprehensive user guide, and helpful technical support that’s always ready to help are important requirements.
| Web Host | Signup | Highlights |
|---|---|---|
| A2 Hosting | $2.99/mo | Fast web host, smooth new users on-boarding process (full review). |
| Hostpapa | $3.95/mo | Eco-friendly host, big discount for first time users (full review). |
| Hostinger | $1.99/mo | Super-low price hosting, good performance (full review). |
| GreenGeeks | $2.95/mo | 300% green hosting, free & easy to manage SSL (full review). |
| InMotion Hosting | $3.49/mo | Very reliable hosting; also offer web design services (full review). |
Steps for Creating Your First HTML File
You can create a basic HTML file using the Notepad on your computer. But it will be painful for writing many lines of codes.
You need a Code Editor. A good code editor will make it easier to write and organize large codes. I use and recommend Notepad++ (free and open-source) for writing web languages. There are other editors you may use like Sublime Text, Atom etc.
Here is what you need to do:
- Install a code editor
- Open it up
- Create a new file
- Save it as a .html file
1. Hello World!
Copy and paste the following code into your new HTML file and save it. Now run it on your web browser.
HTML Code
<!DOCTYPE html>
<html>
<head>
<title>My first web page</title>
</head>
<body>
<p>Hello World!</p>
</body>
</html>
Output:
Congrats! You have created your very first HTML file. You don’t have to understand it at this point. We will cover it shortly.
Understanding HTML Structure
Every HTML file has a common naked structure. This is where everything starts. And every large page of codes will come to this structure after trimming down.
So let’s try to understand it from the “Hello World!” code. The following elements are the mandatory parts for every HTML file.
- <!DOCTYPE html> = It is a declaration to the browser that this is an HTML file. You must specify it before the <html> tag.
- <html> </html> = This is the root element of an HTML file. Everything you write goes between <html> and </html>.
- <head> </head> = This is the meta information part for a browser. Codes inside this tag have no visual output.
- <body> </body> = This is the part that a web browser renders. What you exactly see on a website is the rendering of codes between <body> and </body>.
2. HTML Tags
HTML is the collaboration of hundreds of different tags. You need to learn how they work. You also have to make sure that they have used them in the right way.
HTML tags usually have an opening and a closing tag. The opening tag has the keyword surrounded by a less than (<) and a greater than (>) sign. The closing tag has everything same but an extra forward slash (/) after the less than (<) sign.
Head Tags
All the head tags go between <head> and </head>. They contain meta information for web browser and search engines. They basically have no visual output.
<title> </title>
Title tag defines the title of a web page which is visible on the browser tab. This information is used by web programs and search engines. You can have highest one title per HTML file.
Code:
<title>My first web page</title>
<link>
Link tag links your HTML page with external resources. Its main use is linking HTML page with CSS stylesheets. It is a self-closing tag and doesn’t need the ending </link>. Here rel stands for relation with the file and src means the source.
Code:
<link rel="stylesheet" type="text/css" src="style.css">
<meta>
Meta is another self-closing tag that provides meta information of an html file. Search engines and other web services use these information. Meta tags are a must if you want to optimize your page for search engines.
Code:
<meta name="description" content="This is the short description that search engines show"
<script> </script>
The script tag is used for including a server-side script or making a link to an external script file. It can have two attributes in the opening tag. One is the type and another is the source (src).
Code:
<script type="text/javascript" src="scripts.js"></script>
<noscript> </noscript>
Noscript tag works when scripts are disabled in a web browser. It makes a page compatible to them who don’t allow scripts in their web browsers.
Code:
<noscript><p>Alas! Scripts are disabled.</p></noscript>
Body Tags
All the body tags go between <body> and </body>. They have visual outputs. This is where the most work is done. You have to use these tags to structure your main page content.
<h1> </h1> to <h6> </h6>
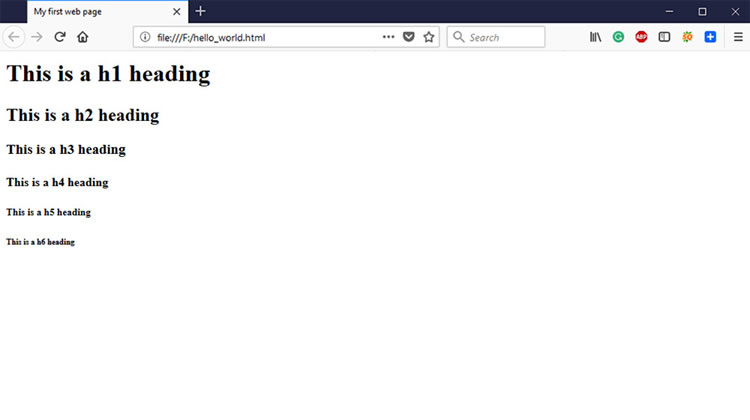
These are the heading tags. The most important heading is tagged with <h1> and the least important with <h6>. You should use them in the correct hierarchy.
Code:
<h1>This is  a h1 heading</h1>
<h2>This is  a h2 heading </h2>
<h3>This is  a h3 heading </h3>
<h4>This is  a h4 heading </h4>
<h5>This is  a h5 heading </h5>
<h6>This is  a h6 heading </h6>
Output:
 Formatting Tags
Text in an html file can be formatted using many formatting tags. It will be necessary when you want to highlight a word or line from your content.
Code:
<p>You can highlight your text in many ways.</p>
<p>You can <strong>bold</strong>, <u>underline</u>, <em>italic</em>, <mark>mark</mark>, <sub>subscript</sub>, <sup>superscript</sup> and more!</p>
Output:
<!- ->
You can deviate some codes from rending using the comment tag. The code will show up in the source code but will not be rendered. The main use of this tag is for creating documentation of html files for future reference.
Example:
<!-- <p>You can comment out any code by surrounding them in this way</p> -->
Other Important HTML Tags
<a></a>
Anchor is an invaluable tag which is used almost everywhere. You will not see any web page online without at least one anchor link.
The structure is same. It has an opening <a> and a closing part </a>. The text you want to anchor goes between <a> and </a>.
There are some attributes that define where and how the user goes after clicking on it.
- ahref=” “ = It defines the destination link. The link goes between the double quotes.
- target=” “ = It defines whether the URL will open in a new browser tab or in the same tab. target=”_blank” is for the new tab and target=”_self” is for opening in the same tab.
- rel=” “ = It defines the relation of the current page with the linked page. If you don’t trust the linked page, you can define rel=”nofollow”.
Code:
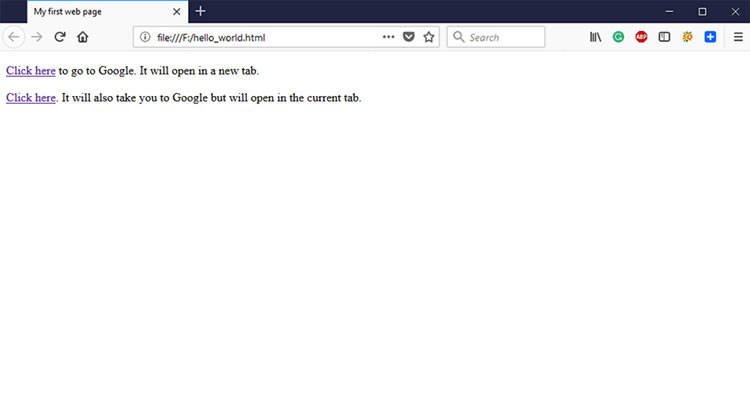
<p><a target="_blank" href="https://www.google.com/">Click here</a> to go to Google.
It will open in a new tab.</p>
<p><a target="_self" href="https://www.google.com/">Click here</a>.
It will also take you to Google but will open in the current tab.</p>
Output:
 <img />
Image tag is another important tag without which you cannot imagine many image-based websites.
<img /> is a self-closing tag. It doesn’t need the traditional closing like </img>. There are some attributes you need to know before you can use it correctly.
- src=” “ = This is for defining the source link of the image. Put the link right between the double quotes.
- alt=” “ = It stands for alternative text. When your image is not loading, this text will give users an idea about the missing image.
- width=” “ = It defines the width of an image in pixels.
- Height=” “ = It defines the height of an image in pixels.
<p>This is the Googleplex in August 2014.</p>
<p>This image has a width of 500 pixels and a height of 375 pixels.</p>
<img src="https://upload.wikimedia.org/wikipedia/commons/0/0e/Googleplex-Patio-Aug-2014.JPG"
alt="Google's Headquarter in August 2014" width="500" height="375" />
Output:
Tips: Want to insert a clickable image? Wrap the image code with an <a> tag. See how it goes.
<ol> </ol> or <ul> </ul>
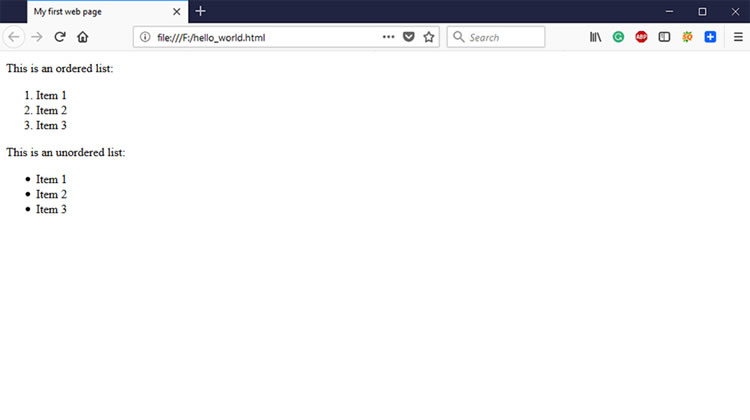
List tag is for creating a list of items. <ol> stands for ordered lists (numbered list) and <ul> stands for unordered lists (bullet points).
The list items inside the <ol> or <ul> is tagged with <li> </li>. li stands for list. You can have as many <li> as you want inside the parent <ol> or <ul> tag.
Code:
<p>This is an ordered list:</p>
<ol>
<li>Item 1</li>
<li>Item 2</li>
<li>Item 3</li>
</ol>
<p>This is an unordered list:</p>
<ul>
<li>Item 1</li>
<li>Item 2</li>
<li>Item 3</li>
</ul>
Output:
 <table> </table>
Table tag is for creating a table of data. There are a few inner level tags that defines table headers, rows and columns.
<table> </table> is the outer parent code. In this tag, <tr> stands for table row, <td> stands for table column and <th> stands for table header.
Code:
<table>
<tr>
<th>Name</th>
<th>Age</th>
<th>Profession</th>
</tr>
<tr>
<td>Jo
<td>27</td>
<td>Businessman</td>
</tr>
<tr>
<td>Carol</td>
<td>26</td>
<td>Nurse</td>
</tr>
<tr>
<td>Simone</td>
<td>39</td>
<td>Professor</td>
</tr>
</table>
Output:
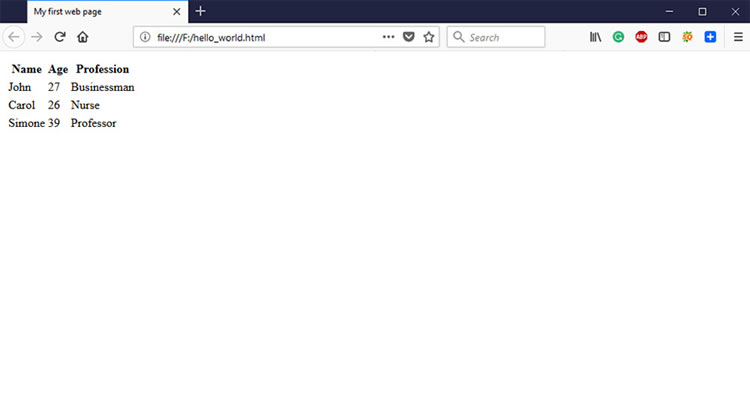 Table Grouping
You can extend a table’s functionality using table grouping elements. There will be times when you need to create large tables that split into multiple pages.
Grouping your table data into header, body and footer, you can allow independent scrolling. The header and body part will print to every page where your table has spanned.
The table grouping tags are:
- <thead> </thead> = For wrapping the headings of a table. It prints to every split page of the table.
- <tbody> </tbody> = For wrapping the main data of a table. You can have as many <tbody> as you need. A <tbody> tag means a separate group of data.
- <tfoot> </tfoot> = For wrapping the footer information of a table. It prints to every split page of the table.
Please note that it is not mandatory to use grouping. You may use it to make bigger tables more readable. While some special developers markedly use these tags as CSS Selectors.
Here is how we can group our exemplified table into <thead>, <tbody> and <tfoot>:
Code:
<table>
<thead>
<tr>
<th>Name</th>
<th>Age</th>
<th>Profession</th>
</tr>
</thead>
<tbody>
<tr>
<td>John</td>
<td>27</td>
<td>Businessman</td>
</tr>
<tr>
<td>Carol</td>
<td>26</td>
<td>Nurse</td>
</tr>
<tr>
<td>Simone</td>
<td>39</td>
<td>Professor</td>
</tr>
</tbody>
<tfoot>
<tr>
<td>Total Persons:</td>
<td>3</td>
</tr>
</tfoot>
</table>
Output:
 <form> </form>
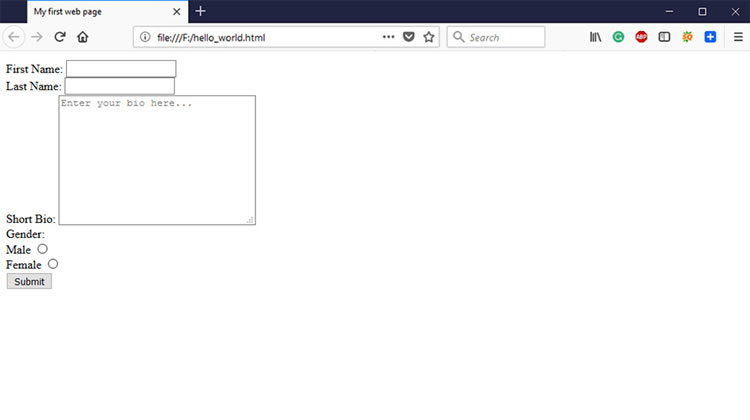
Form element is used for creating interactive forms for web pages. An HTML form contains several consecutive elements. For example: <label>, <input>, <textarea> etc.
The action attribute in form is very important. It points to a server-side or a third-party page for processing the information. For processing, you need to define a method first.
You can use either of two methods, get or post. Get sends all the information in the URL format where Post sends the information in the message body.
There are many types of input for forms. The very basic input type is text. It is written as <input type=”text”>. Types might also be radio, checkbox, email and so on. There should be a submit type input at the bottom for creating a submit button.
<label> tag is used for creating labels and associating them with inputs. The rule of associating labels with the inputs is that have the same value in for=” ” attribute of label and id=” ” attribute of input.
Code:
<form action="#">
<label for="firstname">First Name: </label>
<input type="text" id="firstname"><br>
<label for="lastname">Last Name: </label>
<input type="text" id="lastname"><br>
<label for="bio">Short Bio: </label>
<textarea id="bio" rows="10" cols="30" placeholder="Enter your bio here..."></textarea><br>
<label>Gender:</label><br>
<label for="male">Male</label>
<input type="radio" name="gender" id="male"><br>
<label for="female">Female</label>
<input type="radio" name="gender" id="female"><br>
<input type="submit" value="Submit">
<form>
Output:
 3. HTML Attributes
Attributes are one type of modifiers for HTML tags. They add new configurations to the HTML tags.
An attribute looks like attributename=” ” and sits in the opening HTML tag. The value of the attribute goes between the double quotes.
id=”” and class=””
id and class are the identifiers of HTML tags. Different names are designated to different HTML elements using identifiers. You can use one class identifier for multiple elements. But you cannot use one id identifier for multiple elements.
Code:
<h1 class="heading">This is the main title</h1>
href=””
href stands for Hypertext Reference. They point users to reference links. Anchor tag <a> uses href to send users to a destination URL.
Code:
<a href="https://www.google.com/">Google</a>
src=””
src stands for source. It defines the source of a media or resource you are using in the HTML file. The source can be either local or third-party URL.
Code:
<img src="https://upload.wikimedia.org/wikipedia/commons/0/0e/Googleplex-Patio-Aug-2014.JPG" />
alt=””
alt stands for alternative. It is a backup text that comes in use when an HTML element cannot load.
Code:
<img src="https://upload.wikimedia.org/wikipedia/commons/0/0e/Googleplex-Patio-Aug-2014.JPG" alt="Google's Headquarter" />
style=””
style attribute is often used in HTML tags. It does the job of CSS within the HTML tag. Your styling properties go between the double quotes.
Code:
<h2 style="color:red">This is another title</h2>
4. Code Display: Block vs Inline
Some elements always start on a new line and take the full available width. These are “Block” elements.
Ex: <div>, <p>, <h1>-<h6>, form etc.
Some elements take only the required space and don’t start on a new line. These are “Inline” elements.
Ex: <a>, <span>, <br>, <strong>, <img> etc.
You will need to differentiate block elements from inline when you will be using CSS styles. In this HTML guide, it is not very necessary.
Code:
<!DOCTYPE html>
<html>
<head>
<title>My first web page</title>
</head>
<body>
<h2>This is a H2 heading. It has Block display.</h2>
<h2>This is <u>another</u> H2 heading. Here the underline tag has Inline display.</h2>
</body>
</html>
Output:
5. Double quote vs single quote in HTML
This question is very obvious. What should you use in HTML? Single quote or double quote? People seem to use both but which one is correct?
In HTML, single quote and double quote are same. They don’t make any difference in the output.
You can use anyone you prefer. But mixing up both in a page of codes is considered a bad practice. You should be consistent with any one of them.
6. Semantic HTML vs Non-semantic HTML
Semantic HTML is the latest version of HTML, which is also called HTML5. It is the developed version of non-semantic HTML and XHTML.
Why is HTML5 better? In previous versions, HTML elements were identified by id/class names. For example: <div id=”article”> </div> was considered an article.
In HTML5, <article> </article> tag represents itself as an article without needing any id/class identifier.
For the sake of HTML5, now search engines and other web applications can better understand a web page. Semantic websites have proven to do better for SEO.
Here is a list of some popular HTML5 tags:
- <main> </main> = This is for wrapping the main content that you want to show your viewers.
- <header> </header> = This is for marking up the header part of a content such as title or author meta.
- <article> </article> = It specifies a user-defined or independent content to your viewers.
- <section> </section> = It can group any code such as header, footer or sidebar. You can say, it is the semantic form of a div.
- <footer> </footer> = This is where your footer content, disclaimer or copyright text belong.
- <audio> </audio> = It enables you insert audio files without having any plugin problem.
- <video> </video> = Like <audio>, you can insert videos using this tag without plugin problems.
A simple HTML5 structure would look like this:
<!DOCTYPE html>
<html>
                <head>
                                <meta charset="utf-8" />
                                <title>My first web page</title>
                </head>
                <body>
                                <header>
                                               <nav>
                                                                <ul>
                                                                                <li>Menu 1</li>
                                                                                <li>Menu 2</li>
                                                                </ul>
                                                </nav>
                                </header>
                                <main>
                                                <article>
                                                               <header>
                                                                                <h2>This is the title of the article</h2>
                                                                                <p>Posted by John Doe</p>
                                                                </header>
                                                                <p>Content of the article goes here</p>
                                                </article>
                                </main>
                                <footer>
                                               <p>Copyright 2017 John Doe</p>
                                </footer>
                </body>
</html>
7. HTML Validation
Most of the web professionals validate their code after finishing it. Why is it necessary to validate a code when it is working fine?
There are two possible reasons for validating your codes:
- It will help you make your code cross-browser and cross-platform compatible. The code may not show any error in your current browser, but it might in another one. Code validation will fix it up.
- Search engines and other web programs may stop crawling your page if you have errors in it. You can confirm through validation that you don’t have any major error.
W3C Validator is the most popular service for code validation. They have several methods for validating codes. You can either upload a file or directly input the code in their validation engine.
More Helpful Resources
HTML is an ever-learning topic. More updated versions of HTML might come sooner. So you have to stay updated and keep practicing. Practice is what aces HTML.
Here are some helpful resources for you:
- W3Schools HTML Tutorials
- TutorialsPoint eBook
- Code Academy HTML Guide
- Code Burst Let’s Make a [HTML] Website
- Mozila’s HTML Cheat Sheet
FAQs on HTML
Yes HTML is easy to learn. You can create a basic HTML file using the Notepad on your computer; or you can use a HTML Editor to write and better organize longer pages.
You already have the basics on this page; the next thing you need to do is to learn by doing. Here are six websites where you can write and test your own HTML code.
HTML is the abbreviation of Hyper Text Markup Language. For layman – you can understand HTML as the building block of websites. It is the standard computer language used to structure a web page and its contents.
Yes, HTML is the most common markup language and has the highest acceptance to web browsers. It remains as the vital building blocks (alongside with CSS and JavaScript) for most websites on the Internet. If you are planning to become a web developer or to operate a website; it’s best that you have basic HTML knowledge at the minimum.